1/2 pomegranate
1 peeled orange
1/2 cup raspberries
1/2 cup coconut milk
Place all ingredients in blender. Start Vitamix on variable 1 and increase to 10 then flip to high. Blend approximately 30 seconds. At this point, if it's not cold enough, add a couple cubes of ice and blend or serve over ice. You could also use frozen raspberries and not have to add the ice at the end. Enjoy!
Non-paleo adult only alteration: Add about 1/4 cup of light rum, vodka, or tequila before blending.
Showing posts with label Breakfast. Show all posts
Showing posts with label Breakfast. Show all posts
Sunday, December 2, 2012

Thursday, October 27, 2011
Cooking for One: Breakfast: Whole Wheat Pumpkin Waffles
Just in time for the taste of fall, whole wheat pumpkin (Belgian) waffles! Although fall is not my favorite time of the year (with the impending cold weather creeping in and an end to motorcycle riding season), I do love the tastes that come along with fall and the cool crisp mornings. It just invites creamy soups, spicy dishes and fill you up hearty meals!
Here's your recipe (makes 6 waffles):
- Water, 1.25 cup
- Pumpkin, canned, 1 cup
- Egg, fresh, 1 large
- Vegetable Oil, 2 tbsp
- Apple Cider Vinegar, 2 tbsp
- Splenda Brown Sugar Blend, 2 tbsp
- Whole Wheat Flour, 2 cup
- Powdered Milk, nonfat, 0.5 cup
- Baking Powder, 2 tsp
- Baking Soda, 1 tsp
- Pumpkin Pie Spice, 2 tbsp
- Salt, 0.5 tsp

Preheat your Belgian waffle maker and spray with non-stick cooking spray. (I use Pam for Grilling). Mix the wet ingredients together in one bowl and the dry ingredients together in another bowl. (I put the brown sugar in with the wet ingredients). Pour the wet ingredients into the dry ones and mix thoroughly. Allow to sit for about 5 minutes while the waffle maker is warming up and then mix again (this is because it make take a little more time for the whole wheat flour to absorb the liquid). When your waffle maker is hot, place about 0.5 cup of batter into maker and spread out (you'll notice in my picture that they didn't spread out much to fill the waffle maker since the batter is a little thick). Close and cook for about 2 minutes. Because of the sugar in the batter, they will darken (and possibly burn) if you leave them in too long. Remove the waffle and repeat the process until your batter is gone. I usually spray my non-stick cooking spray in the waffle maker about every other waffle just so I don't have any problems removing them. (I hate having to clean out a stuck waffle!)
I placed mine on cooling racks since I was planning to freeze these to have for quick easy breakfast meals. After coming to room temperature, place cooling racks in the freezer. After about 2 hours, you can remove the racks, place the waffles in a freezer bag and put back in the freezer. To enjoy one of these, heat them up in a microwave for about 1 minute (they may become a little soggy though) or place them in a toaster oven on toast for about 10 minutes. I like them topped with cinnamon sugar butter or toasted pecan syrup.
I hope you enjoy!
Nutrition Facts: Serves 6 The following is per serving:
Calories: 263, Fat: 6.5g, Cholesterol: 32mg, Sodium: 618mg, Carbohydrates: 44g, Fiber: 6.5g, Protein: 9g
**Editorial note** If you'd like to use regular brown sugar in this recipe, it would be 4 tbsp and if you don't have pumpkin pie spice, you can replace it with 1.5 tbsp cinnamon, 1 tsp allspice, 0.5 tsp ginger and 0.5 tsp nutmeg to get about the same flavor. You can also use 1.5 cups of milk instead of the water and powered milk in the recipe.
Monday, April 11, 2011
Cooking for One: Breakfast: Egg Wraps
This is a great basic recipe for an egg wrap. You can make a single serving every morning or you can make a batch, freeze them, and microwave them when you want on for a quick and easy to go recipe. Whether you are making one or six, the recipe is the same. Here's what you'll need per serving:
Here's my recipe for batching the freezable microwaveable version, I make 6 at a time so I have them for the entire workweek! (Here we're making pepper-onion egg wraps)
 Beat the eggs and water together in a large bowl and set aside. Heat a large non-stick frying pan over medium high heat. Add the frozen peppers and onions to the pan. Saute these together until the onions are translucent and the mixture starts to brown.
 Add the egg mixture to the pan and move around until completely cooked (basically you are making a scrambled egg mixture). You will want to cook the eggs until they are dry (some people prefer their scrambled eggs a little more moist but since you are going to wrap them up in a tortilla, you want to make sure they are on the dryer side). Once completed remove pan from heat.

Preheat your oven to 350 degrees. Lay out your 6 tortillas and add 0.5 ounce of cheese down the center of each one. Divide the egg mixture and place an equal amount to top of cheese on each tortilla.
Wrap each tortilla closed by folding in the sides in slightly then rolling it up onto itself so it looks like a burrito.


 Place each one on a non-stick cookie sheet (I used a silicone baking mat in the picture but would use a non-stick cookie sheet instead. The silicone didn't allow the wrap to brown nicely). Bake approximately 10 minutes until the tortilla starts to turn crispy. Flip each wrap over and bake another 10 minutes. Remove from oven and allow to cool.
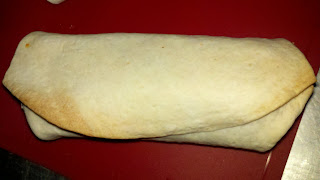
To freeze, once they are at room temperature, I like to place them in a single layer in a storage container and put them in my freezer. It's easy to grab one out of the container, wrap it in waxed paper (or place it in a baggie or reusable single serve storage container), and take it with you to microwave at work. Or you can microwave it before you leave the house to have as a quick breakfast to go! To reheat the frozen wrap, place on a microwave safe plate and microwave on high for 30 seconds, flip over and microwave another 30 seconds (cooking times vary).

There you have it. For a prep/cooking time of about a half hour, you can make 6 breakfasts that you can grab and go with you. I usually make this when I am cooking dinner so that the oven is already hot and it is saving time doing two things at once. You can eliminate the baking part if you wanted to serve these to a family right of way. The baking in this recipe is so that when it gets microwaved to reheat, they don't get soggy. Bon Appetite!
Nutrition Facts: Serves 6 The following is per serving:
Calories: 254, Fat: 12g, Cholesterol: 230mg, Sodium: 320mg, Carbohydrates: 21g, Sugar: 0.8g, Protein: 14g
- 1 egg
- 1 teaspoon water
- 1 medium flour wrap
- 0.5 ounce of shredded cheese
Here's my recipe for batching the freezable microwaveable version, I make 6 at a time so I have them for the entire workweek! (Here we're making pepper-onion egg wraps)
- 6 eggs
- 2 tablespoons water (equals 6 teaspoons)
- 6 medium flour wraps
- 3 ounces of shredded cheese
- 2 cups frozen pepper and onion mixture

 Beat the eggs and water together in a large bowl and set aside. Heat a large non-stick frying pan over medium high heat. Add the frozen peppers and onions to the pan. Saute these together until the onions are translucent and the mixture starts to brown.
  Add the egg mixture to the pan and move around until completely cooked (basically you are making a scrambled egg mixture). You will want to cook the eggs until they are dry (some people prefer their scrambled eggs a little more moist but since you are going to wrap them up in a tortilla, you want to make sure they are on the dryer side). Once completed remove pan from heat.
Preheat your oven to 350 degrees. Lay out your 6 tortillas and add 0.5 ounce of cheese down the center of each one. Divide the egg mixture and place an equal amount to top of cheese on each tortilla.
Wrap each tortilla closed by folding in the sides in slightly then rolling it up onto itself so it looks like a burrito.


To freeze, once they are at room temperature, I like to place them in a single layer in a storage container and put them in my freezer. It's easy to grab one out of the container, wrap it in waxed paper (or place it in a baggie or reusable single serve storage container), and take it with you to microwave at work. Or you can microwave it before you leave the house to have as a quick breakfast to go! To reheat the frozen wrap, place on a microwave safe plate and microwave on high for 30 seconds, flip over and microwave another 30 seconds (cooking times vary).

There you have it. For a prep/cooking time of about a half hour, you can make 6 breakfasts that you can grab and go with you. I usually make this when I am cooking dinner so that the oven is already hot and it is saving time doing two things at once. You can eliminate the baking part if you wanted to serve these to a family right of way. The baking in this recipe is so that when it gets microwaved to reheat, they don't get soggy. Bon Appetite!
Nutrition Facts: Serves 6 The following is per serving:
Calories: 254, Fat: 12g, Cholesterol: 230mg, Sodium: 320mg, Carbohydrates: 21g, Sugar: 0.8g, Protein: 14g
Subscribe to:
Posts (Atom)